The Ruby Native setup guide
Get your app running natively.
Get your Rails app running on your phone in three steps. Then make it feel like a native app, with just a few changes to your HTML.
Install the gem
Add Ruby Native to your Gemfile and run the install generator. It creates config/ruby_native.yml with a starter tab bar and colors, and allows the preview tunnel host in development.
$ bundle add ruby_native
$ bin/rails generate ruby_native:install
Start the preview tunnel
With your Rails server running on port 3000, install cloudflared and start the preview. It opens a public tunnel and prints a QR code.
$ brew install cloudflare/cloudflare/cloudflared
$ bundle exec ruby_native preview
Preview your app
Open the Ruby Native app you used for the demo and scan the QR code from your terminal. Your Rails app is now running on your phone.
$ bundle exec ruby_native preview
Tunnel connected! Scan this QR code:
https://your-tunnel.trycloudflare.com
Heads up: Your app probably looks a little rough right now! More or less your website shoved into a native shell. That's expected, follow the steps below to add some polish.
From web view to App Store worthy
The same Rails app, before and after the changes below. Most of the work is hiding non-content elements from the app and rendering them natively via Ruby Native.
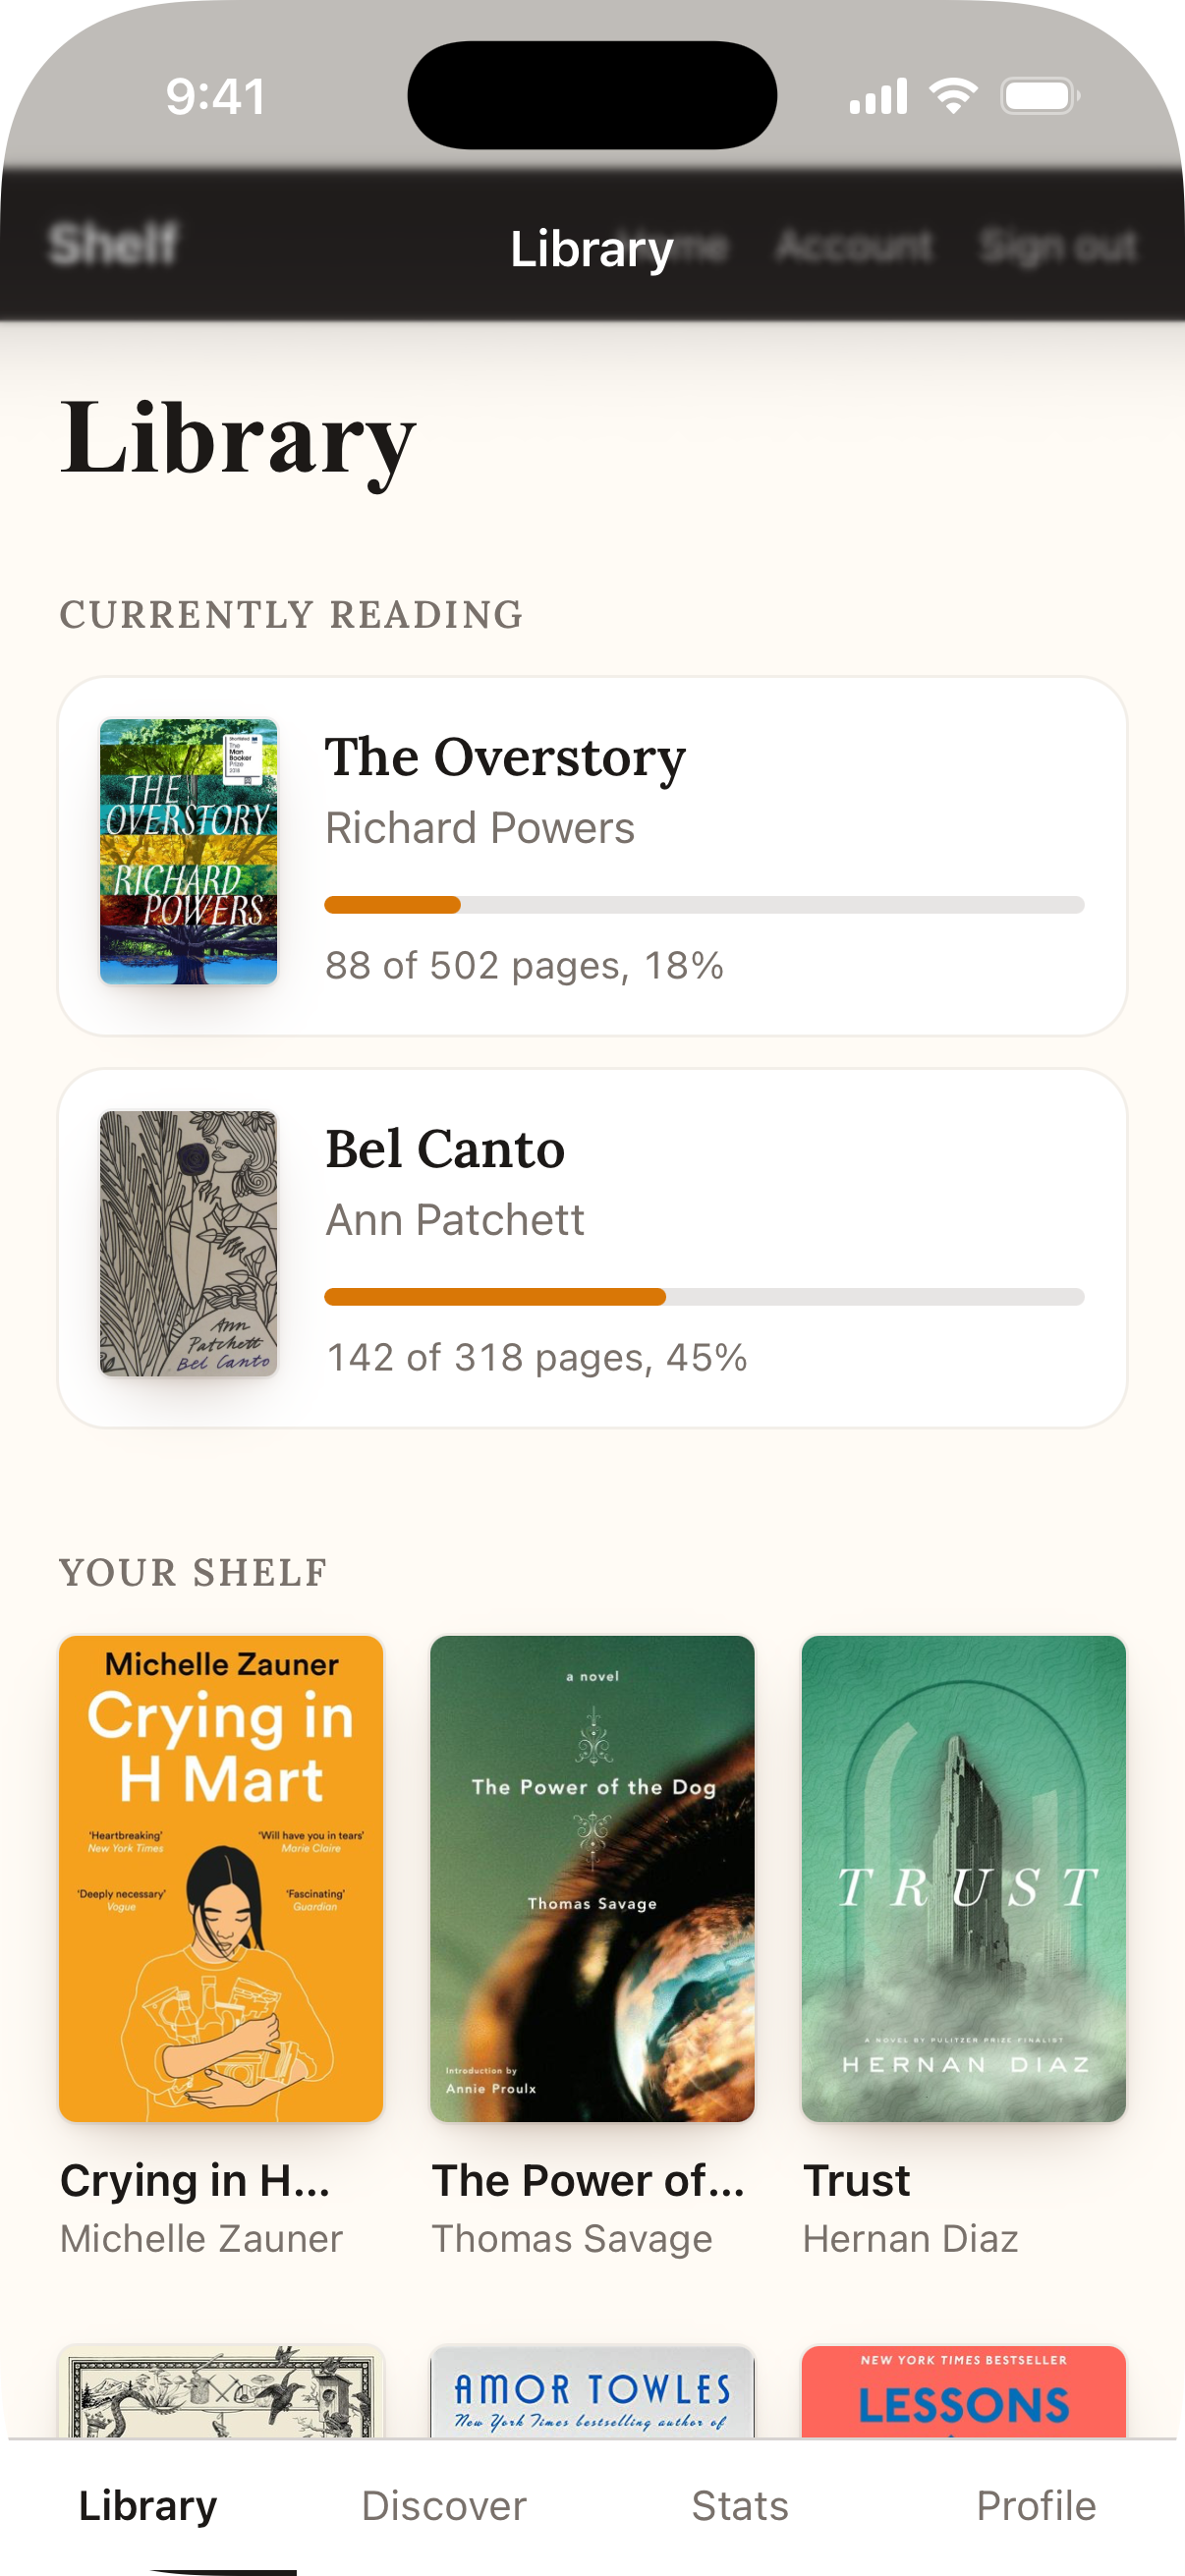
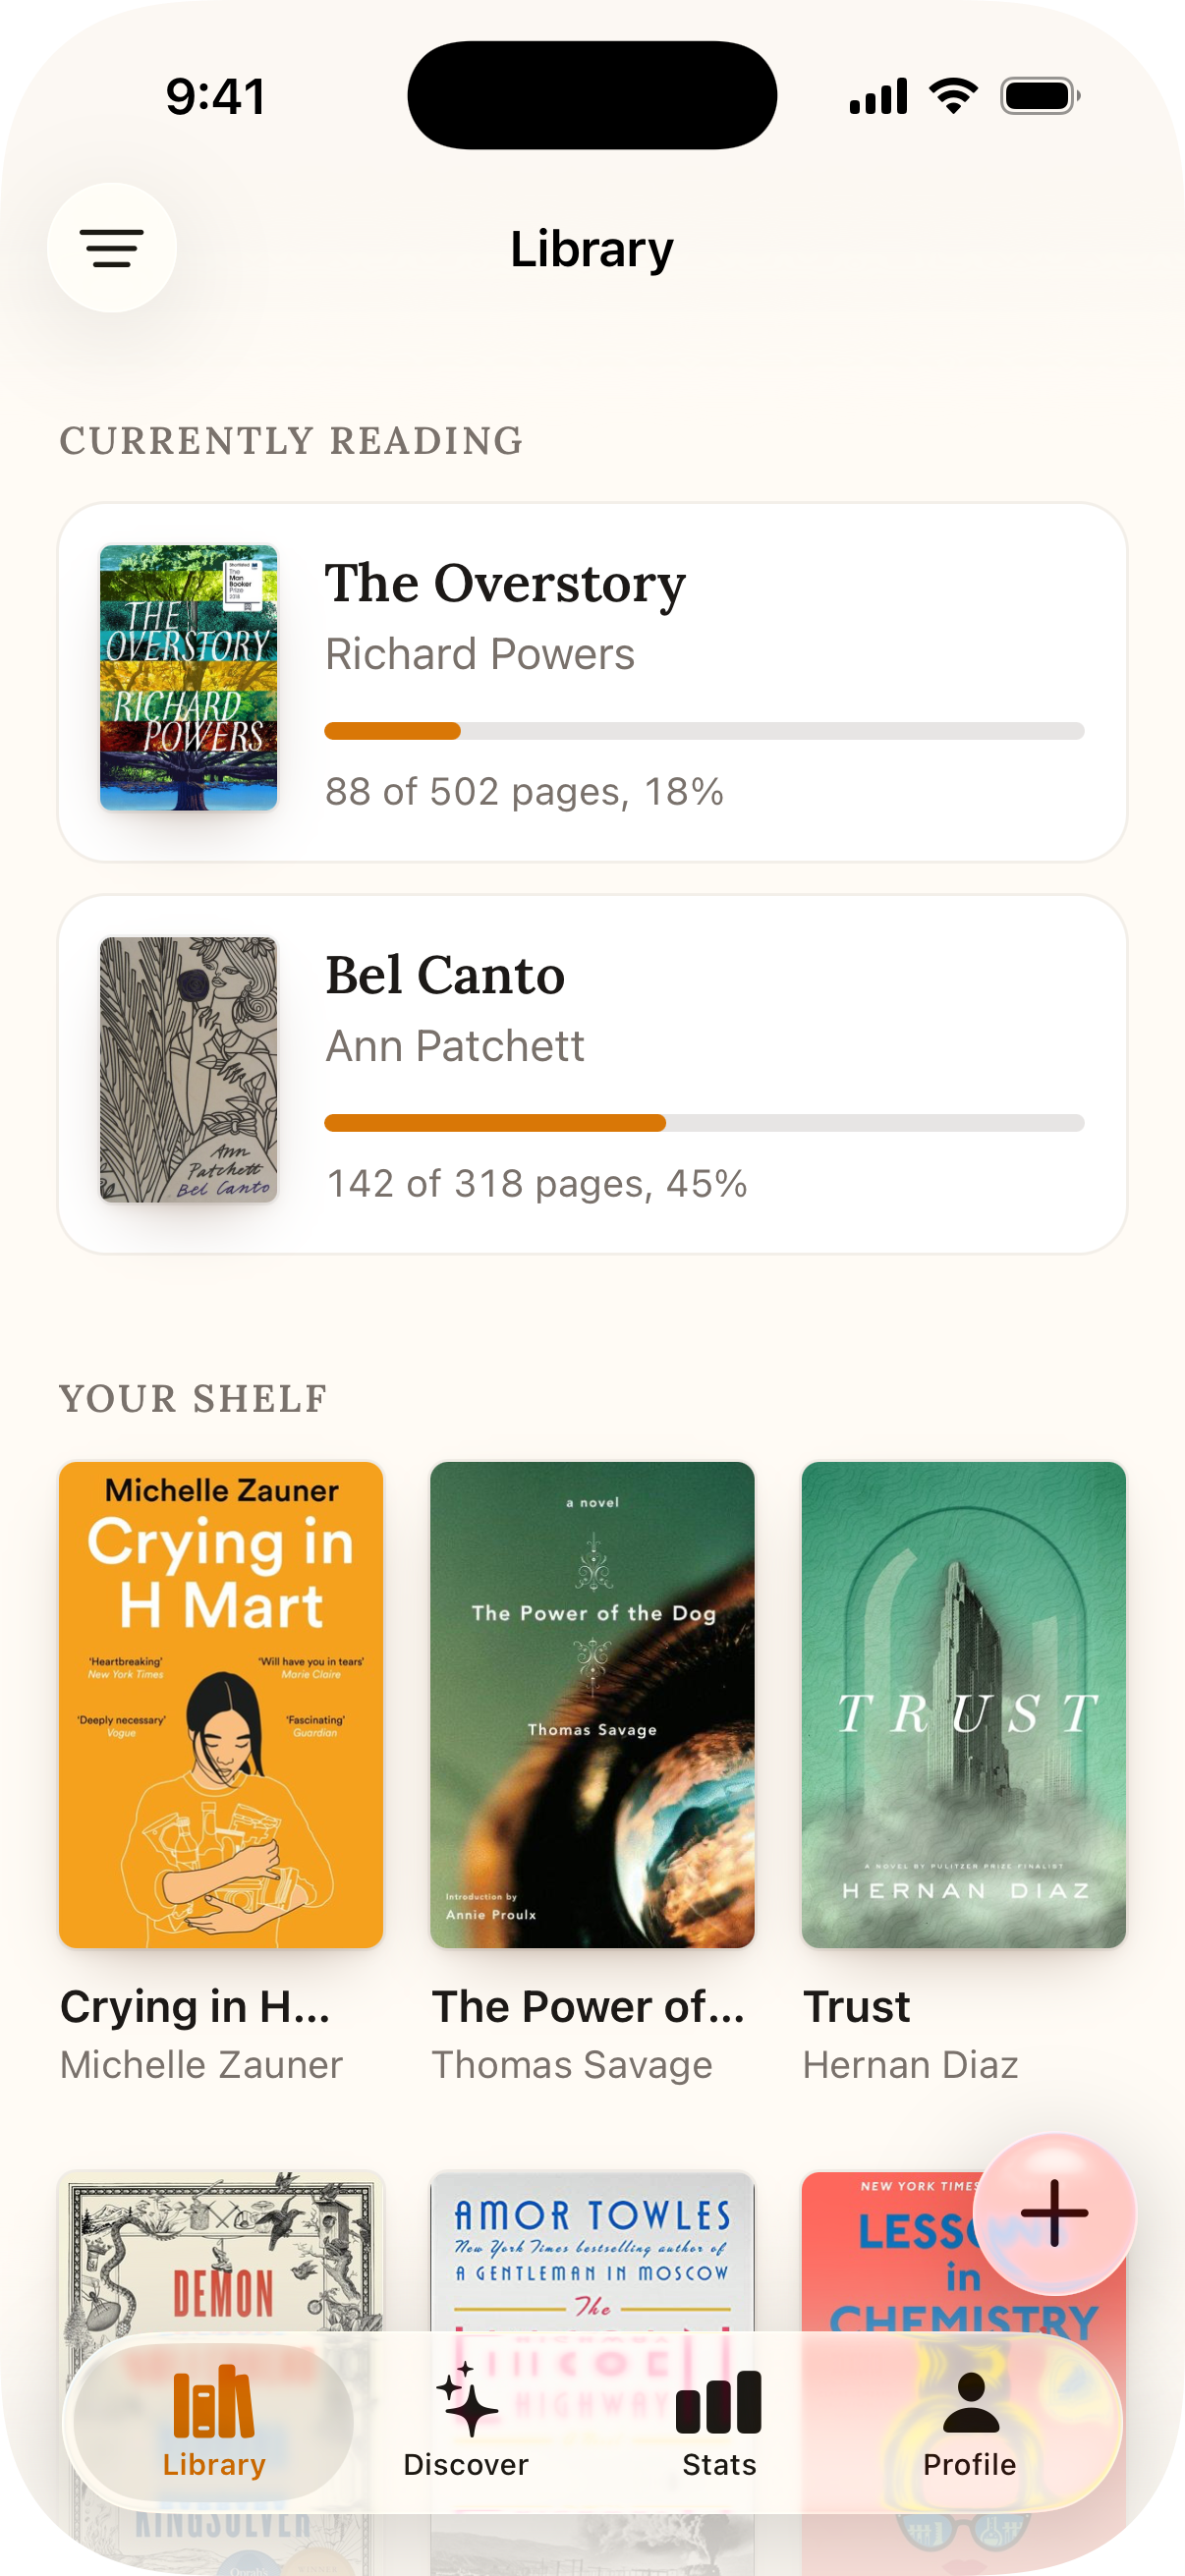
-
Two headers stacked on top of each other.
Hide your web navbar and footer for native users, then add a native navigation bar to each screen.
app/views/layouts/application.html.erb<%= render "navbar" unless native_app? %>
<%= native_navbar_tag("Dashboard") %>
-
Content tucked under the status bar or home indicator.
Opt into safe areas with the viewport meta tag, the gem's stylesheet, and the native-inset class on your content wrapper.
app/views/layouts/application.html.erb<meta name="viewport" content="width=device-width, initial-scale=1, viewport-fit=cover">
<%= stylesheet_link_tag :ruby_native %>
<main class="native-inset"><%= yield %></main>
-
A white flash or mismatched background between screens.
Set background_color in your config to the exact value of your CSS body background.
config/ruby_native.ymlappearance:
background_color: "#0f172a" # match your CSS body
-
A web hamburger or bottom navigation that feels out of place.
Define your tabs in YAML and let Ruby Native draw a native tab bar instead. Icons use SF Symbols (iOS) or Material Symbols (Android) names.
config/ruby_native.ymltabs:
- title: "Home"
path: "/"
icon: "house"
- title: "Profile"
path: "/profile"
icon: "person"
-
From here, it's polish.
Keep going with native forms, back buttons, haptics, and push notifications.
Ready to deploy for real?
Create an account, set up your Apple credentials, and deploy to TestFlight for free. No Xcode, no certificates, no provisioning profiles. Pay only when you're ready for the App Store and Google Play.
Need help getting started?
Email me at [email protected] and I'll help you get your app up and running.